

In this article, we will discuss ways we can upload a csv file to HarperDB. We will be making use of the following tools: Node.js, Harperive, multer and ejs.
First off,
What is CSV?
CSV stands for Comma Separated Value. It is a file used for store large data. It ends with .csv extension. Csv is a delimited text file that uses a comma to separate values. Each record consists of one or more fields separated by commas.
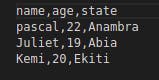
This is how a csv file looks like:
Now you've understood what a CSV is, let's talk about HarperDB
What is HarperDB
HarperDB is a simple database solution for collecting, disseminating, and analyzing data across your organization. It provides unrivalled flexibility, speed, security, and value. HarperDB is a distributed database that runs anywhere presenting a single interface across a multi-cloud solution.
If you are wondering what's so special about HarperDB, here's the answer:
- Support for running complicated, fast, ACID-compliant SQL queries on JSON without duplicating data.
- HarperDB allows you to run your database everywhere, from the edge to the cloud and everywhere in between.
- HarperDB Studio has a simple and direct management interface that allows you to browse, query, and manage data all in one location without having to code.
- A simple REST API allows for seamless integration into any project or tool. It also supports a variety of languages through various drivers and plugins.
We will use a HarperDB cloud instance for this tutorial to connect our application to the database
Creating a HarperDB cloud instance
To create a database, visit HarperDB's website, click on start free and fill in the form to create an account
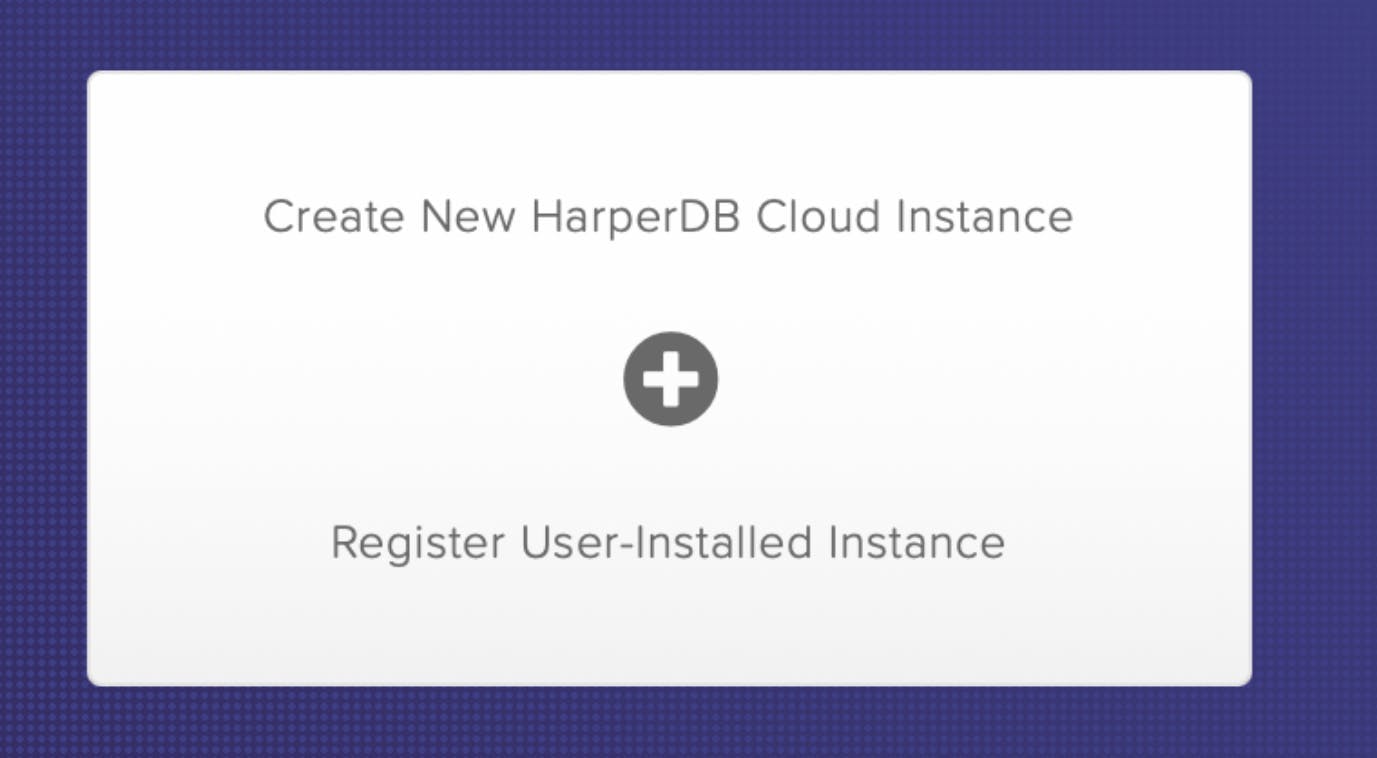
- Once you're done and logged in, click on Create New HarperDB Cloud Instance.
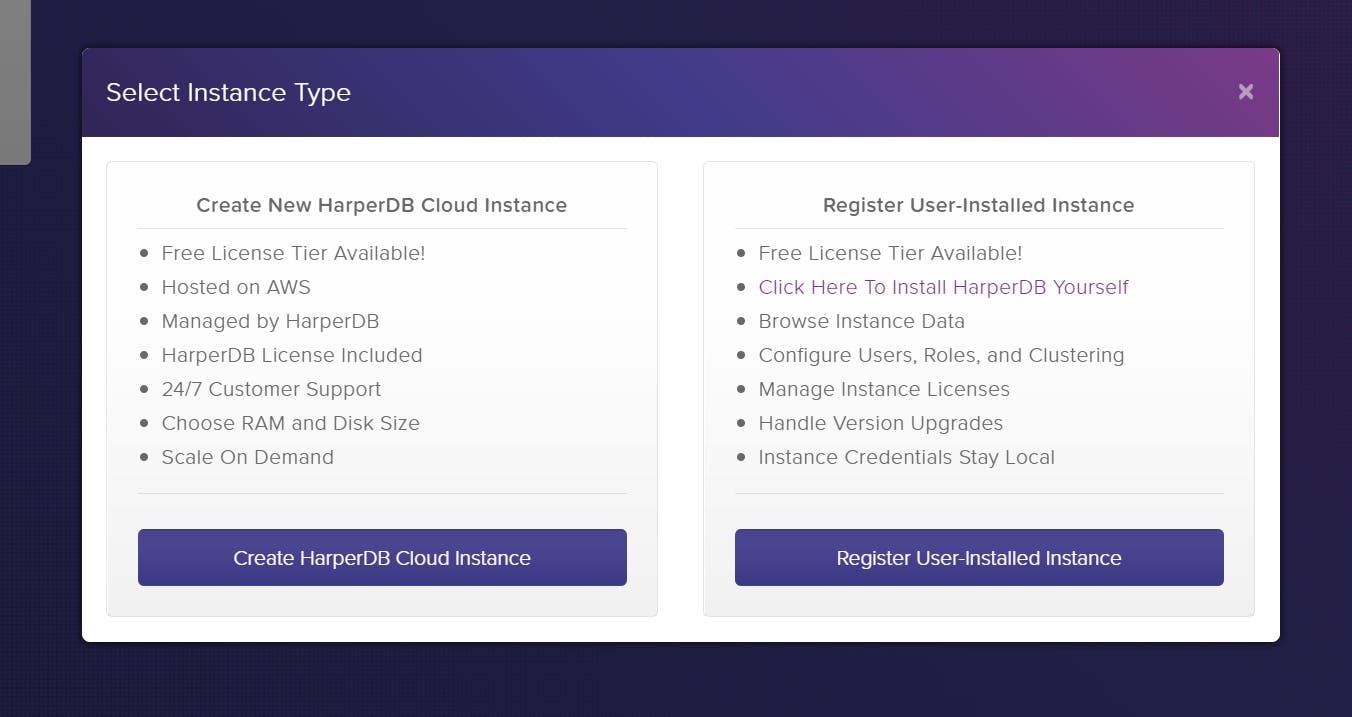
- Select your preferred instance type. It can be created locally or set up on the cloud. We will be using the cloud instance for this tutorial.
- Fill info
A form field as shown below will appear, you are expected to fill in the fields to proceed.
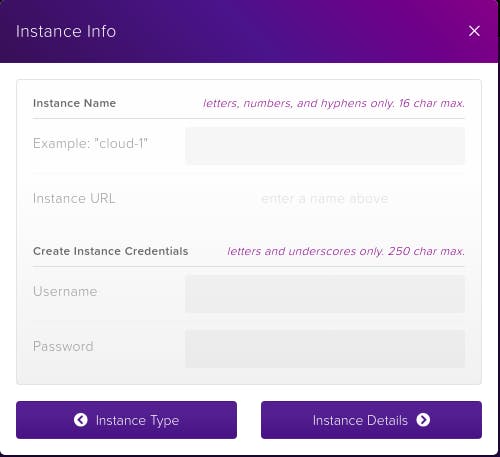
Note: Do not forget your username and password for you will need them later
- Choose your instance spec We will use the default options for this tutorial
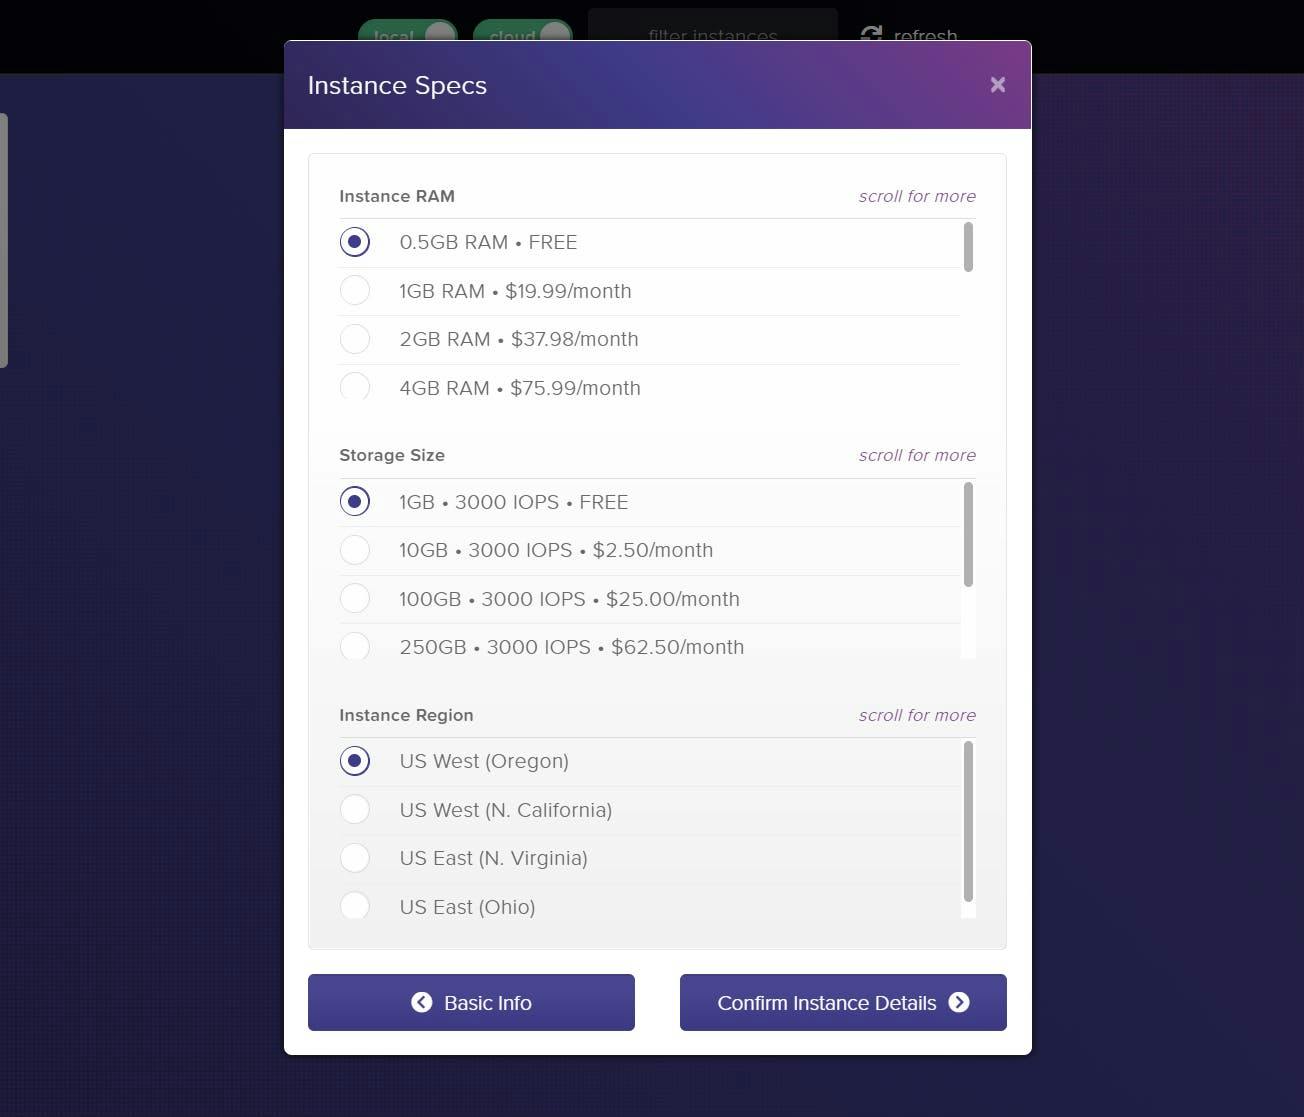
Click Confirm Instance Details and your new cloud instance will be on your dashboard.
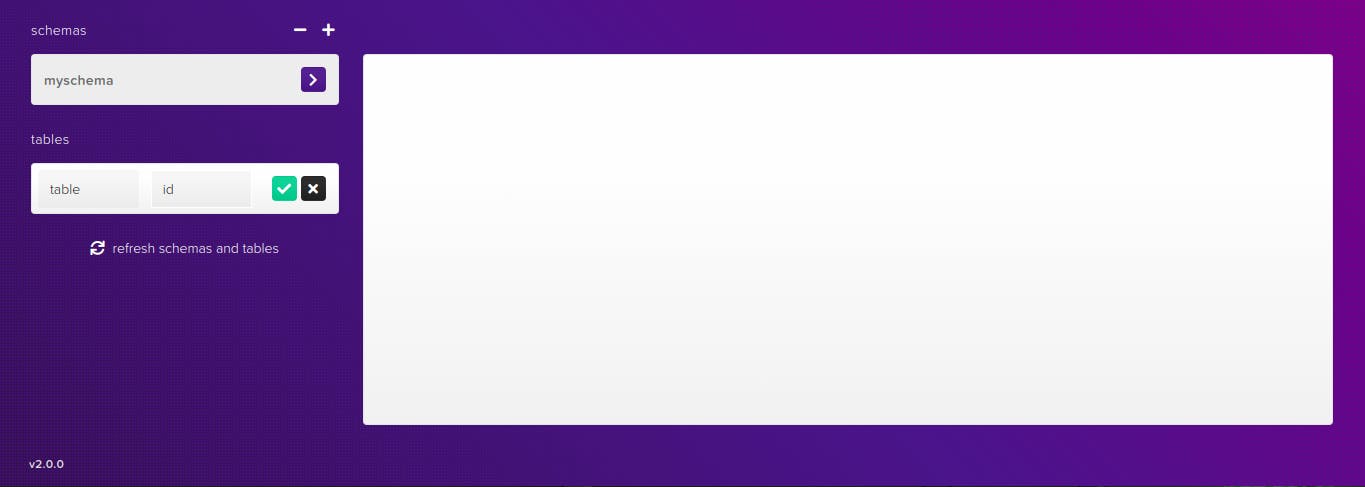
Next, we create our schema and table as seen below
Uploading CSV file
HarperDB provides an easy way of uploading csv files to our database. Here is how:
After creating our schema and table, click the file icon at the top right corner of the table
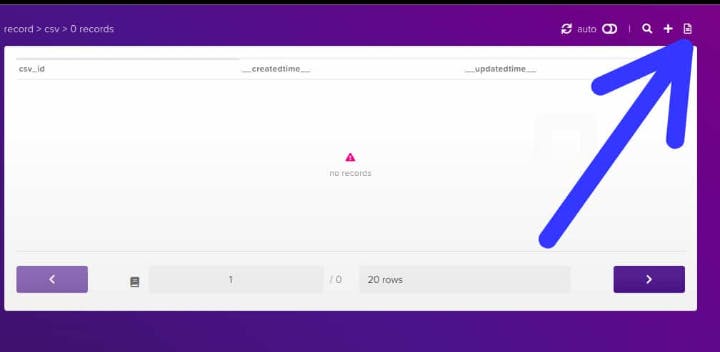
Then you select how you want to upload your csv file. You can either import from a URL or from your computer
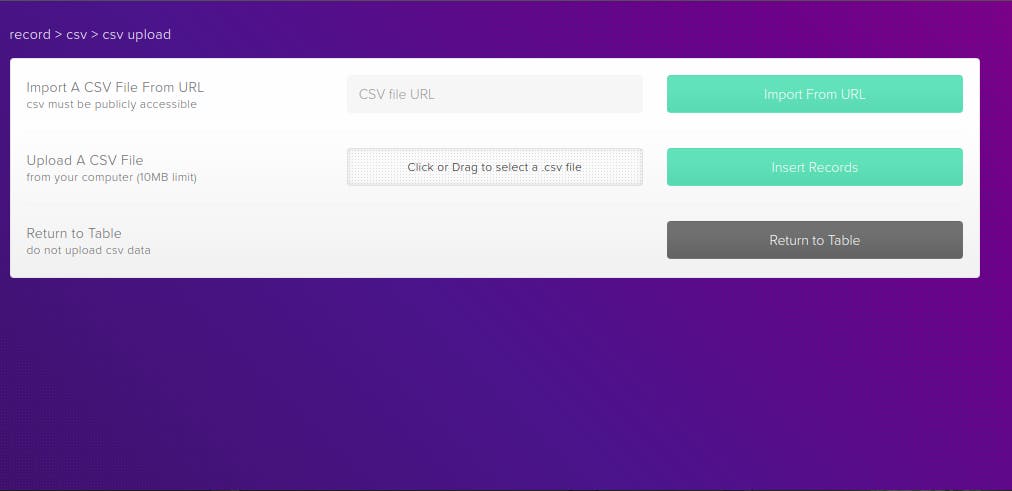
After uploading successfully, you will be redirected back to your table, there you will see your uploaded data.

Let's now create a Node.js app for uploading a csv file
Create Node.js project
Next, we set up our node.js project. After initializing npm, we install the following packages.
npm install express harperive dotenv multer ejs neat-csv nodemon
Then we modify the script section in package.json
 "scripts": {
    "start": "node index.js",
    "dev": "nodemon index.js",
  }
In the root directory, create index.js file, and write the following code:
const http = require('http')
const app = require('./app')

const port = process.env.PORT || 3000

const server = http.createServer(app)


server.listen(port, () => {
  console.log('Server up and running on port '+ port)
})
This creates our server to run our app, passing our app.js file which we will create next. It listens on our port which is an environment variable i.e process.env.PORT or 2300
Next we create our app.js file and export it
const express = require('express')
const app = express()

app.get('/',  (req, res) => {

  console.log('Hello, this is my project')
})

module.exports = app
Now lets run our app. In the terminal, type the following and press ENTER to run
npm run dev
Now our app is up and running...
Environment variables
Our environment variables is written in the .env file which we will create in our project root folder and pass the following;
PORT=port
INSTANCE_URL=https://myinstance-url.harperdbcloud.com
INSTANCE_USERNAME=username
INSTANCE_PASSWORD=password
SCHEMA=myschema
You can get url, username and password from your cloud instance
Connecting to database
So far we have been able to create our server, now let us connect to our database. In the root directory of our project, create a folder and name it config. Inside the config folder, we create db.js and write the following;
const harperive = require('harperive')

const {INSTANCE_URL, INSTANCE_USERNAME, INSTANCE_PASSWORD} = process.env


const DB_CONFIG = {
  harperHost: INSTANCE_URL,
  username: INSTANCE_USERNAME,
  password: INSTANCE_PASSWORD
}

const Client = harperive.Client
const db = new Client(DB_CONFIG)

module.exports = db
In our app.js file, we import our db.js and .env files
. . .
require('dotenv').config()
const db = require('./config/db')
File system
We can use the file system (fs) module to upload our csv file to database. In our app.js, we import the fs and neat-csv modules;
const fs = require('fs')
const neatCsv = require('neat-csv')
Let use create a csv file sample, we will name it sample-data.csv. We then input the following data to ;
name,age,class
Junior,19,ss3
Ada,18,ss2
Kemi,14,ss1
Then in our app.get() method, we put the following;
. . .
fs.readFile('/sample-data.csv', async (err, data) => {
  const csvData = await neatCsv(data)

    //insert file
    db.insert({
      schema: process.env.SCHEMA,
      table: "csv",
      records: csvData
    }, (err, response) => {
      if (err) return res.status(500).json(err)
      console.log(response.data)
     })
  })
We use the readFile method which is asynchronous to read our csv file and it contains two arguments. The first argument contains the path to our csv file, the second argument we pass an async function with err or data. Within the function scope, we use the neatCsv module to parse our csv file data and assign it to the csvData variable. With our database client (db), we use the insert operation to upload our data to the database. The insert operation contains two arguments as well, first is an object with the schema, table and records properties where we pass our schema name, table name and data respectively. The second argument which takes in an err and response. If we receive an error from the database we return a status code of 500, if succesfully uploaded, we log the data to the console.
When we run our app and enter our localhost url localhost:2300/, you will notice we have successfully uploaded a csv file to our database, cool right? Don't you think it would be cooler is we could upload our csv file from the client side? Yaass lets give it a go!
Render EJS
Now we want to render content to the browser. We will use the ejs, a templating library for this project. In the root directory, we create our views folder to contain our ejs files. Inside the views folder, we create index.ejs file and input the following:
<div id="addCsv" class="">
  <div class="modal-dialog">
    <div class="modal-content">
      <div class="modal-header">
        <h4 class="modal-title">Upload CSV</h4>
      </div>

        <form id="csvUpload" action="/upload" method="POST" enctype="multipart/form-data">
          <div class="modal-body">
            <div class="form-group">
              <label for="file">Upload file</label>
              <input type="file" id="csvFile" class="form-control" />
            </div>
          </div>

          <div class="modal-footer">
            <button type="submit" class="btn btn-success">Upload</button>
          </div>
        </form>
    </div>
  </div>
</div>
If you noticed, the code doesn't look complete, we are missing the top and bottom parts of our template. Next, we create the a new folder in our views folder. We will call it components- you can call it whatever you want. In our components folder, we create top.ejs file and input the following:
<!DOCTYPE html>
<html lang="en">

<head>
    <meta charset="UTF-8">
    <meta name="viewport" content="width=device-width, initial-scale=1.0">
    <meta http-equiv="X-UA-Compatible" content="ie=edge">
    <title><%= pageTitle %></title>
    <link rel="stylesheet"
     href="https://stackpath.bootstrapcdn.com/bootstrap/4.5.0/css/bootstrap.min.css">
    <link rel="stylesheet" href="https://maxcdn.bootstrapcdn.com/font-awesome/4.7.0/css/font-
      awesome.min.css">
    <link rel="stylesheet" href="https://fonts.googleapis.com/icon?family=Material+Icons">
    <link rel="stylesheet" href="/style.css">
we create another file bottom.ejs and input the following:
<script src="https://code.jquery.com/jquery-3.5.1.min.js"></script>
<script src="https://cdn.jsdelivr.net/npm/popper.js@1.16.0/dist/umd/popper.min.js"></script>
<script src="https://stackpath.bootstrapcdn.com/bootstrap/4.5.0/js/bootstrap.min.js"></script>
<script src="/script.js"></script>
</body>

</html>
We then import these files to our index.ejs;
<%- include('components/top.ejs') %>

<div id="addCsv" class="">
  <div class="modal-dialog">
    <div class="modal-content">
      <div class="modal-header">
        <h4 class="modal-title">Upload CSV</h4>
      </div>

        <form id="csvUpload" method="POST" enctype="multipart/form-data">
          <div class="modal-body">
            <div class="form-group">
              <label for="file">Upload file</label>
              <input type="file" id="csvFile" class="form-control" />
            </div>
          </div>

          <div class="modal-footer">
            <button type="submit" class="btn btn-success">Upload</button>
          </div>
        </form>
    </div>
  </div>
</div>


<%- include('./components/bottom.ejs') %>
To render our index.ejs on the browser, we edit our app.js
...
app.set('view engine', 'ejs')
app.set('views', 'views')
app.use(express.urlencoded({extended: false}))


app.get('/',  (req, res) => {

res.render('index', {
  pageTitle: 'Upload'
})

})
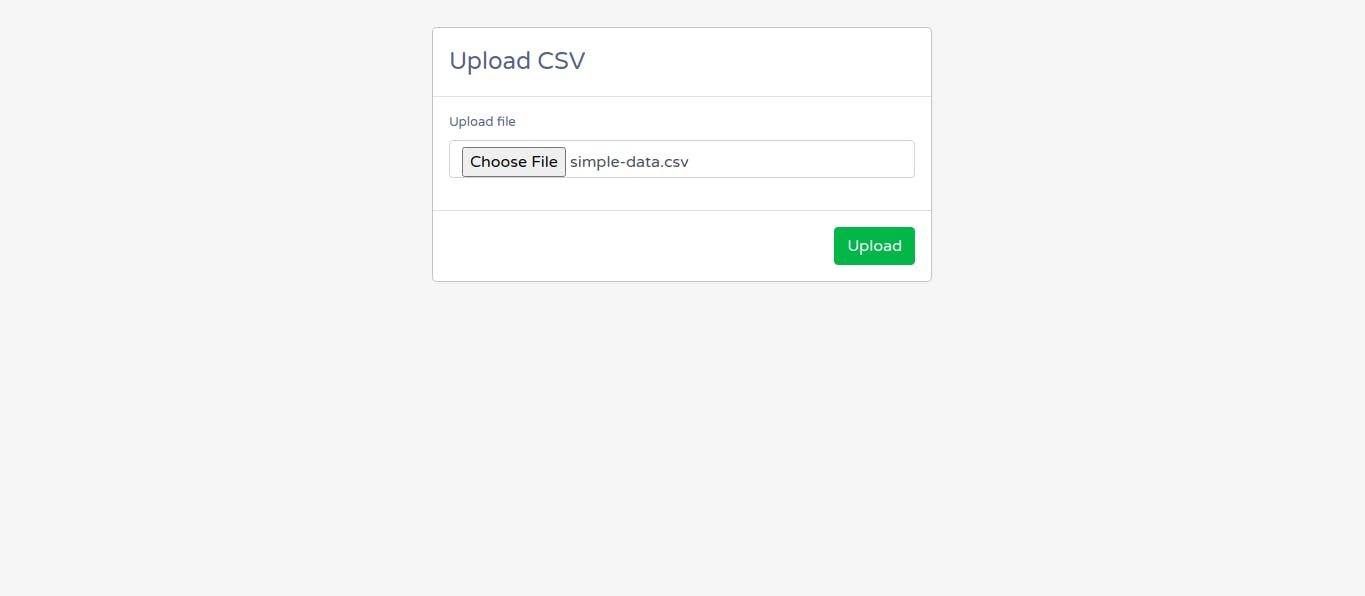
When we enter localhost:2300/ on our browser, we see our form rendered.
To style our app, we will need our css file. In node.js apps, css files are usually stored in the public folder (as well as JavaScript files for writing plain JavaScript codes). So we create our public folder in the root directory and create style.css and script.js files in it. In order for our app to read those files, we add the following to our app.js file;
app.use(express.static(path.join(__dirname, 'public')))
style.css
body {
    color: #566787;
    background: #f5f5f5;
    font-family: 'Varela Round', sans-serif;
    font-size: 13px;
}
header{
    background: #8f36b8;
    color: #fff;
    padding: 16px 30px;
    min-width: 100%;
    border-radius: 3px 3px 0 0;
}
header .btn{
    color: #fff;
    float: right;
    font-size: 13px;
    border: none;
    min-width: 50px;
    border-radius: 2px;
    border: none;
    outline: none;
    margin-left: 10px;
}
.table-title {
    background: #8f36b8;
    padding: 16px 30px;
    color: white;
}
table.table tr th, table.table tr td {
    border-color: #e9e9e9;
    padding: 12px 15px;
    vertical-align: middle;
}
table.table td a {
    display: inline-block;
    text-decoration: none;
    outline: none;
    margin-right: 15px;
}
Our app should be looking like this at the moment:
Multer
Multer is a node. js middleware for handling multipart/form-data , which is basically used for uploading files.
Lets import our multer module in our app.js
const path = require('path')
const multer = require('multer')
We can control how we store our file by using the multer.diskStorage()
const storage = multer.diskStorage({
  destination: (req, file, cb) => {
    cb(null, __dirname + '/public/assets/uploads')
  },
  filename: (req, file, cb) => {
    cb(null, file.fieldname + '-' + Date.now() + path.extname(file.originalname))
  }
})
We set our storage destination to be in the public folder (you can set any destination of your choice). For our filename we use the fieldname property concatenated with Date.now() method (returns milliseconds since January 1, 1970) and finally with the path .extname() method (returns extension of the file)
We want our form to only accept files with .csv extension. So we filter our file by writing the following
const fileFilter = function(req, file, cb) {
  if(file.mimetype.split('/')[1] === 'csv'){
    return cb(null, true)
  }else{
    return cb(new Error('Only csv files are allowed'), false)
  }
}
We then assign our multer function to a variable, pass the storage and fileFilter
const upload = multer({storage: storage, fileFilter: fileFilter})
Now let us create a post method to upload our data to the database. In the app.js file, we write;
app.post('/upload', upload.single('file'), async (req, res) => {

fs.readFile(req.file.path, async (err, data) => {
  const csvData = await neatCsv(data)

    // insert file
    db.insert({
      schema: process.env.SCHEMA,
      table: "csv",
      records: csvData
    }, (err, response) => {
      if (err) return res.status(500).json(err)

      res.redirect(302, "/record")
    })
  })
})
The post method takes in three arguments, first is the url, second is our multer middleware, third is the function. In the function scope we use the fs.readFile() to read the path to the file. We then use neatCsv to parse the data and assign to csvData. We use theinsert` operation for uploading data to the database where our schema, csv and data is provided.
In order for our /upload route to be effective, we need to add an eventListener to our form when submitted. This is done in the script.js file in our public folder
We add the following code to our script.js
const uploadForm = document.getElementById('csvUpload')

uploadForm.addEventListener('submit', (e) => {
  e.preventDefault()
  const file = document.getElementById('csvFile')

  const formData = new FormData()

  formData.append("file", file.files[0])

  fetch("/upload", {
    method: "post",
    body: formData
  })
  .then((res) => {
    window.location.href = "/record"
  })
  .catch((err) => console.log("An error occured " + err))
})
So we get our form via the csvUpload id attribute and assign it to uploadForm variable. We then add an event listener to the form, to perform a function whenever it's being submitted. By default, the page reloads whenever a submit button is clicked (one of the things I don't get about JavaScript 🙄). To prevent this from happening, we use the preventDefault() method. We then get the input file via the csvFile id attribute and assign it to file variable.
Next, we create a variable instance (formData) of the FormData() constructor and append our form file data to a string-file (The file string is what is then passed to the upload.single() middleware in app.post() ). Using the Fetch API, we post our form via the /upload route, passing the formData variable. If our data is uploaded successfully, we redirect our webpage to /record. If it fails, we log the error to the console.
The record page is where we will fetch our data. so we create record.ejs in the views folder and write the following code
<%- include('components/top.ejs') %>
</head>
<body>
<header class="container-xl">
<div class="row">
<div class="col-sm-6">
<h2><b>CSV</b> to HarperDB</h2>
</div>
<div class="col-sm-6">
<a href="#addCsv" class="btn btn-info" data-toggle="modal"><i class="material-icons"></i> <span>Upload CSV</span></a>
</div>
</div>
</header>
<div class="container-xl">
<div class="table-responsive">
<br><br>
<div class="table-wrapper">
<table class="table table-striped table-hover">
<% if(records.length > 0) { %>
<% records.forEach(row => { %>
<tbody>
<tr>
<% for (let data in row ) { %>
<% if (data !== "__createdtime__" && data !== "__updatedtime__") {%>
<td><%= row[data] %></td>
<%}%>
<%}%>
</tr>
<%})%>
<% } else { %>
<tr>
<td>No data found</td>
</tr>
<% } %>
</tbody>
</table>
</div>
</div>
</div>
<!-- Upload CSV file -->
<div id="addCsv" class="modal fade">
<div class="modal-dialog">
<div class="modal-content">
<div class="modal-header">
<h4 class="modal-title">Upload CSV</h4>
</div>
<form id="csvUpload" action="/upload" method="POST" enctype="multipart/form-data">
<div class="modal-body">
<div class="form-group">
<label for="file">Upload file</label>
<input type="file" id="csvFile" class="form-control" />
</div>
</div>
<div class="modal-footer">
<input type="button" class="btn btn-danger" data-dismiss="modal" value="Cancel" />
<button type="submit" class="btn btn-success">Upload</button>
</div>
</form>
</div>
</div>
</div>
<%- include('./components/bottom.ejs') %>
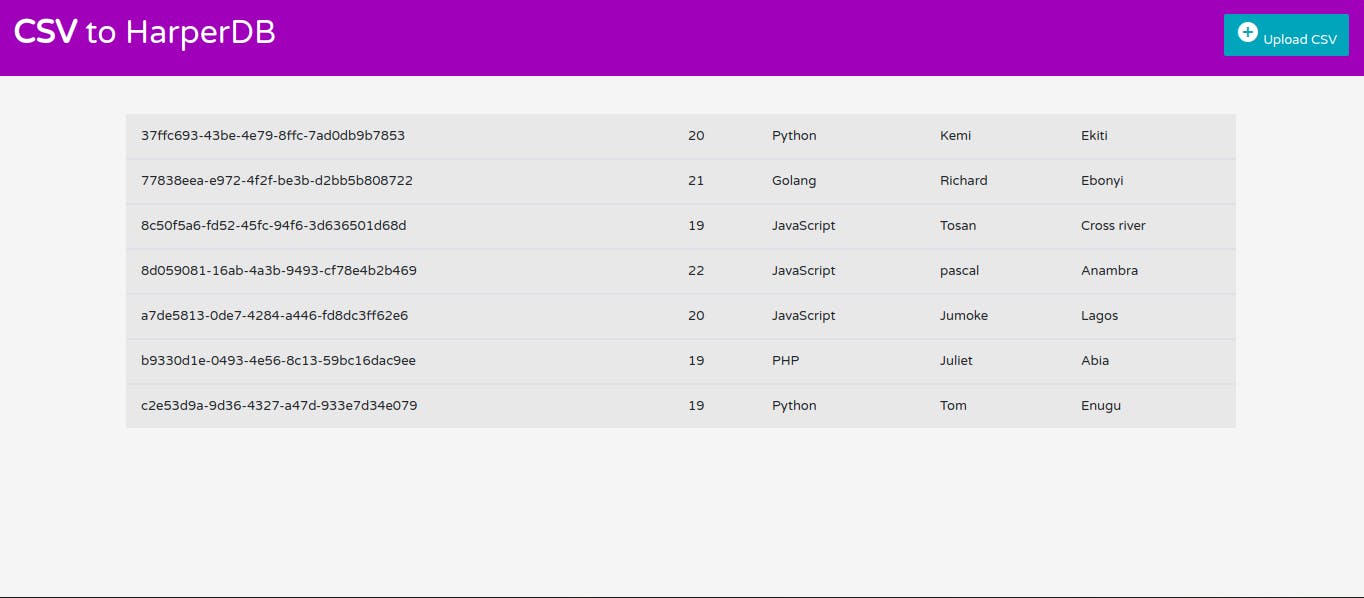
Here we arrange our data in a table. We first check if the record is empty. If it is not, we use the array forEach() method to loop through the records array. We then name each data row. Since each data is an object, we use the for...in loop to iterate each object. Finally we passed the object data to the <td></td> element. The data is arranged in alphabetical order.
So we have successfully uploaded and displayed our csv file from the database. Pretty cool right?
Challenge
You will observe that whenever you upload a new csv file, it merges with the previous one. In order to tackle this issue, we drop the table and recreate it whenever we upload. Here's how:
We edit app.post()
app.post('/upload', upload.single('file'), async (req, res) => {

 try{
    const data = await db.dropTable({
      schema: process.env.SCHEMA,
      table: 'csv'
    })
  }catch(e){
    console.log('Failed to drop table')
  }

  try{
    const data = await db.createTable({
      schema: process.env.SCHEMA,
      table: 'csv',
      hashAttribute: '_id'
    })
  }catch(e){
    console.log('Failed to create table')
  }

  fs.readFile(req.file.path, async (err, data) => {
  const csvData = await neatCsv(data)

    // insert file
    db.insert({
      schema: process.env.SCHEMA,
      table: "csv",
      records: csvData
    }, (err, response) => {
      if (err) return res.status(500).json(err)

      res.redirect(302, "/record")
    })
  })
})
Here, whenever we upload a csv file, using try..catch, we drop the table first, and proceeded to recreating the table before inserting the data to the database.
Once done, we should have something like this displayed on the browser:
Conclusion
- CSV stands for Comma Separated Value. It is a file used for store large data. It ends with .csv extension.
- HarperDB is a distributed database that runs anywhere presenting a single interface across a multi-cloud solution.
That's a wrap! 🎁
Thank you for reading through this article 🙏. If you found it helpful, kindly drop a like👍 or comment 💬. If you have any correction or suggestion, drop a comment 💬 as well (you can also drop a like👍 too 😉).
Have a nice day! 👋
Reference
Project inspired by Olabisi's How to build Library Management System with HarperDB, Ejs and Nodejs
- Source code - github.com/Kodecheff/csv-harperdb